
What Happens During an Asbestos Inspection?

Asbestos can be hidden in ordinary building materials for decades. Floor tile, pipe insulation, textured ceilings, roofing materials, and wallboard compounds may all contain asbestos, especially in older properties. Because asbestos fibers are hazardous when disturbed, a proper inspection is a controlled, documented process, not a quick visual check.
A professional asbestos inspection identifies possible asbestos-containing materials, collects samples safely when needed, and sends those samples to a qualified laboratory. The goal is to give property owners clear answers while protecting occupants, workers, and the inspector.

The inspection starts with a site assessment
The first step is the initial site assessment. The inspector reviews the property, asks about planned work, and notes the age, layout, and condition of the building.
This conversation matters because asbestos risk often increases when materials will be disturbed. A renovation, demolition, water damage repair, HVAC upgrade, or flooring replacement can turn a stable material into a potential fiber-release concern.
During the assessment, the inspector may ask about:
The building’s age and history
Previous renovations or repairs
Areas scheduled for demolition or remodeling
Known damage, leaks, or deterioration
Accessible crawl spaces, attics, basements, and utility areas
Existing records from past asbestos testing or abatement
The inspector also identifies safety conditions before moving through the site. For example, damaged insulation in a mechanical room may require extra caution. Loose ceiling texture or crumbling pipe wrap may call for restricted access until sampling can be completed safely.
At this stage, the inspector is not guessing from appearance alone. Many asbestos-containing materials look the same as non-asbestos materials. Visual review helps determine what should be sampled, but laboratory testing is what confirms the presence or absence of asbestos.
Suspected materials are identified and documented
After the site assessment, the inspector walks through the relevant areas and identifies materials that could contain asbestos. These are often called suspected asbestos-containing materials.
Common examples include:
Vinyl floor tile and mastic
Popcorn or textured ceiling material
Pipe insulation and boiler insulation
Duct wrap and HVAC insulation
Roofing felt, shingles, and flashing materials
Cement siding or cement board
Wallboard joint compound
Fireproofing material
Some older adhesives and sealants
The inspector documents each material by location, type, condition, and quantity when practical. They may take notes and photographs to support the final report.
Condition is especially important. A material in good condition and unlikely to be disturbed may present a different risk than one that is cracked, water-damaged, powdery, or exposed in a work area. Inspectors often look for signs of deterioration, abrasion, impact damage, or past disturbance.
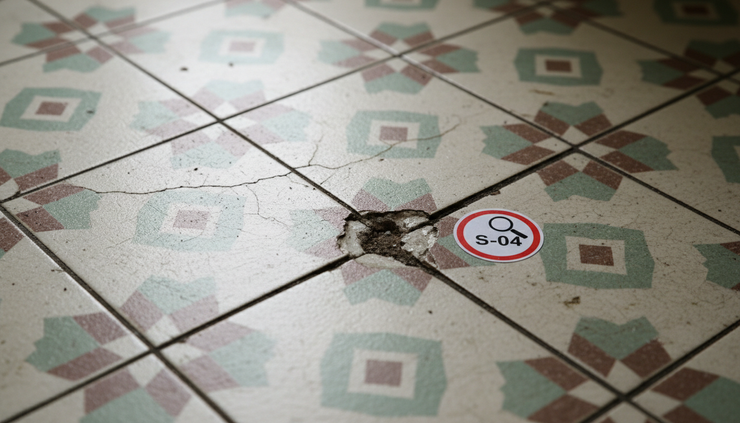
The scope of the inspection depends on the reason for testing. A pre-renovation inspection may focus only on materials that will be affected by the work. A whole-building survey is broader and may include more rooms, systems, and hidden areas that can be accessed safely.
Samples are collected using controlled methods
If suspected materials need confirmation, the inspector collects samples. This is one of the most important parts of the process because improper sampling can release fibers.
A trained inspector uses safe sample collection procedures designed to disturb only a small amount of material. The exact method varies by material, but the process often includes:
Limiting access to the immediate area
Wearing appropriate personal protective equipment
Lightly wetting the material when suitable to reduce dust
Using clean tools to remove a small sample
Placing the sample in a sealed, labeled container
Cleaning the sampling point and surrounding area
Sealing or patching the sample location when appropriate
Recording the sample number, location, and material type
The inspector avoids unnecessary disturbance. They do not tear out large sections or create dust to “get a better sample.” A small, representative sample is usually enough for lab analysis.
Each sample must be linked to clear documentation. If the laboratory result says a sample contains asbestos, the report needs to show exactly where that sample came from. This chain of information helps property owners, contractors, and abatement professionals make safe decisions later.

Professional sampling also helps prevent cross-contamination. Inspectors use clean tools, proper containers, and careful handling so results are reliable. This is one reason asbestos sampling should not be treated as a do-it-yourself task.
Laboratory testing confirms the results
Once samples are collected, they are sent to a laboratory for analysis. The lab examines the material to determine whether asbestos is present and, if so, what type may be in the sample.
In the United States, asbestos bulk samples are commonly analyzed using established microscopy methods. The specific method depends on the sample type, project requirements, and applicable regulations. The inspector or environmental consultant should explain which type of analysis is appropriate for the situation.
Lab testing provides the confirmation that visual inspection cannot. Two materials may look identical, yet one may contain asbestos and the other may not. Testing removes guesswork and creates a record that can guide renovation planning, abatement, disposal, and worker protection.
Turnaround time can vary based on the laboratory, sample volume, and urgency of the project. Once the lab completes its work, the results are sent back to the inspector for review and inclusion in the final report.
The final report explains what was found
The final report is the main deliverable from the asbestos inspection. It should be clear enough for a property owner to understand and detailed enough for contractors or abatement professionals to use.
A professional report typically includes:
The property address or project location
The date of inspection
The purpose and scope of the inspection
Areas inspected and any areas not accessed
A list of suspected materials
Sample locations and sample identification numbers
Photographs or diagrams, when useful
Laboratory results
Material condition notes
Conclusions about which materials contain asbestos
Recommendations for next steps
The report may also identify whether materials are friable or non-friable. Friable materials can be crumbled by hand pressure and may release fibers more easily if disturbed. Non-friable materials are more solid, but they can still become hazardous if cut, sanded, drilled, broken, or demolished.

The recommendations depend on the findings. Some materials may be left in place if they are intact and not likely to be disturbed. Others may require repair, encapsulation, removal by licensed abatement professionals, or special handling before renovation or demolition.
Safety guides every part of the process
Safety is prioritized because asbestos fibers are microscopic and can remain airborne when released. People cannot reliably see, smell, or feel asbestos fibers in the air. That makes prevention critical.
A professional inspection reduces risk by controlling disturbance, using protective equipment, following sampling procedures, and relying on lab confirmation. It also helps prevent unsafe renovation work. Without inspection and testing, workers may unknowingly cut, scrape, sand, or demolish asbestos-containing materials.
A careful inspection protects more than the person collecting samples. It helps safeguard occupants, maintenance staff, contractors, neighbors, and future workers who may enter the space.
The key takeaway is simple: an asbestos inspection is a methodical safety process. It starts with a site assessment, identifies suspect materials, collects samples under controlled conditions, confirms results through laboratory testing, and ends with a clear report. When asbestos may be present, good information is the first step toward safe decisions.


Comments